29 March 2007

Night Ranger Intro & mod's


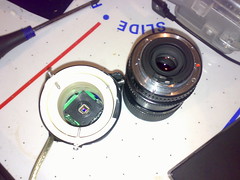
Well we decided to get hold of a remote control helicopter for the lab and after much debate ended up with the electric night ranger by Venom Air Corp . Theses little beast's have a single highspeed engine and two micro servos as well as gyro assisted flight and to boot no explosive LIPO batteries to go boom. This little guy runs on a custom nimh cells running at 8.4 volts or 7 1.2 aaa cells i guessing, as its wrapped in black shrink wrap.
The set is "ready" to fly with just a few basic things to do, assuming you know how to fly (we dont).
The power cell needs to be charged and the controller needs AA cells, eight in fact. But these were in the box, (nice venom green branded ones too).
Their is a heap of diffrent blade decals and we advise you use the main rotor stickers as they actually help to keep the blades from getting damaged, we chipped a blade on a cardboard box of all things and the stickers and a bit of black electrical tape had us up and running in no time at all.


The Next thing to do is read the book while the cell is charging, and watch the video of why you need more area then this to fly in ! We have replaced the tail rotor retaining grommet with a piece of longer silicon hose to hold on better and reduce the chance of loosing it. We also resoldered and taped ver the tail rotor motor as we snapped off both cables flying around the back yard and smashing into a window at night ! whichi is why theres no video.
I also built a training frame and removed all the chassis stickers to clean up the look, lees toy, more drone. The last thing we did was to reroute the aerial around the tail of the helicopter to reduce damage and increase the amount of unwund wire. The aerial was getting frayed wrapped around the skids.
We are having hassles getting stable flight so the whole chassis needs to be rebuilt and centered better, this is a matter of undoing the carbon rods that make up the moat of the frames and resetting them with new silicon tube with more of it. We also managed to snap a skid on a hard landing which is now taped and glued so is working fine, but plans are in place to rebuild them (the skids) in carbon fibre square rod like the trainer frame, and i'll most likely build the frame into it as well saving more weight, and balancing it up easier.
ore on the chopper as we learn to fly, then add our 2.4ghz micro cam to the underside for some onboard crashes. i mean flights.

28 March 2007

Terminator robot


Terminator robot
Originally uploaded by sprocket2cog.
This guy just popped yp in our local hobby store, a full size cast metal robot from the terminator line of robot, well terminators.
dosent do anything, but nice either way.

27 March 2007

lego webcam hacked


lego webcam hacked
Originally uploaded by sprocket2cog.
This is the lego web camera from the old Vision command system hacked to an adaptor ring made from some pvc fittings, The lens is a 35mm SLR lens from RICOH and features a macro mode as well as a zoom function. This is an ideal starter lens as the macro lets you use it for close up of circuits to read part id numbers so you can reverse enginner the projects for your own evil designs.
The screws on the ring lock into the len's flanges that used to lock it to the camera body.
The screws are on 25-30 degree angles to allow the lens to be slightly moved in and out for ultra fine adjustment of the focal lenth which for this lens was around 2 inches. ( i think ?) been a while since i knocked up the ring adaptor.

Viper from microbric - power hack

For all you viper owners out there looking for a way to add external power to your project so you dont need all those aaa cells , Heres the power mod for the board, just add your own 7-9 volt power supply to the robot, The red wire "no not the red wire !" solders to the switch block terminal as per the photo and the earth bolts into the holes in the board used to hold the battery boxes on, which you dont need now.

22 March 2007

XBR-001 mirco edtion


For those observant people out there, you may have noticed that the photos of the laminated sections seem out os scale to the plans . Well they are, during the mock up I noticed that the body and chassis were out of scale so after a rethink based on other ideas in our little book of hacks and mods. I decided to cut the chassis down from 300 to 250mm for this first run, the body rings are the same size but it means that the height will be lower to the ground reducing the center of gravity as well.
This will mean less rings for the robot at first reducing the cost, but the bigger robot will allow the ame parts to be reused. think of this as a micro chassis that can later be used as a secon equipment bay or even an oversized head.

Latest Sony Robot Hit's The Street

Well since the end of our friend AIBO we have all wondered if sony was going to bring us something new. Well its not the real deal, but lets hope sony releases some of these guys for us to hack, I mean use..

20 March 2007


Went looking for movies and found this little three part film for your pleasure, check out he other parts at youtube ( just click videos by this user

Robot Destruction Systems


So you want to get rid of that Furby or V2 robot and want a fun way o do it ? well how about this. I would love to see a robot flick this switch...

FURBY- The Choice for Terrorist Hit Squad's


Well a few weeks ago i happened to be on a plane heading for Melbourne when I noticed this little bit of infomation that might make you think twice about tha kid and his furby sitting next to you.
The Plane safety pamphlet in the plane had a little photo of furby with a cross though him, so I figured a little bit more investigation was in order, I dont normally read the plane safety stuff, I figure if I just run up and down shouting We are all going to die , then Ill be fine :)
So after looking more closely I was shocked to see that furby isnt allowed to be operated on board aircraft from this company ? What we yet havent worked out is if it;s because the little guy is really a walking time bomb, or if the annoying litle guy makes you all want to open the doors and jump out to get away... So dont take furbys on planrse or the Men in black are likely to haul your ass off to the little back room and probe your furby for contraband.
Poor guy, as if his life wasnt hard enough, with not having legs to run away from those little terrorists, i mean preschoolers. Happy hacking .

LEGO NXT Open Software Beta


Gostai has released it URBI for NXT beta for puplic use and has started a forum and support center at the site. The screenshots look good and I'm downloading it (3.6mb)in prep for my NXT set. I know I wasnt going to get more lego, but hey Its worth it just for the built in bluetooth controller. While i havent tried out the package yet, any free robot software is good robot software, so check it out
http://www.gostai.com/lego.html

18 March 2007

Battery Hacking #1

Ok so you need some watch batteries in a hurry and cant find any on the shelf? well if its the smaller thin ones your looking for then grap one of the small 12 volt batteries that go in some cameras, and my multimeter :P, so anyway now the part that comes with a disclaimer, (dont do this unless your sure, cells are dangerous if they rupture) get a file and file the end cap from the positve terminal untill it comes out , you may need to use a set of pliers or a screwdriver to lever it out once the metel case is open. Now tip up the power cell and if you have to, pry the edge where the metel case has a seam, untill the eight cells in the battery fall out.
So now you have some power for your next led throwie project which can be found over at instructables.com. Or if you need to reverse this to get a 12volt cell for the camera dlash that went flat, well grap a cheap set of watch batt's and tape eight together to form the stacked cell, then place a small magnet from a old cd drive to the end as a positive terminla and there you go,
Remember, dont play with cells that rupture or show signs of swelling, and please wear safety glasses for this one.

17 March 2007

Wow Wee, Old RoboRaptor Hacks Back


The old raptor hacksite is up online at my good friends site at http://www.evosapien.com/
And includes those sort after goodies including the silent start up and bigger bite.
While your there , make sure to check out the other hackers pages, including the great v2 hacker canadian knitsu.
So head over to our raptor site at evosapien and get those old dusty raptors out of the cupboard.
now you have the perfect excuse to hack that raptor, just dont tell the better half what your up to .
bring on the robot army.

16 March 2007

Robot Fighters Animation

Found this video over at youtube, its not bad for both animation and robot design. THese guys look cool, the future of the robo one and bipeds in general ? we hope so.

Xbr Merchandise


Ive got a few Shirts up with the xbr robot on them at the gallery at zazzle, check out the xbr gallery at zazzle

15 March 2007

3D images without the Glasses


I saw this used on some sites around the net and the idea to apply it to the nasa rover images hit me, so here it is , my first mars rover animated stereogram.

14 March 2007

Optical Illusion #1


please wait large animation file - loading frames

watch the center for a while, defocus, destress, relax and wait for the world... yeah right, its just an optical illusion, it isn't aportal to another dimension

Game background (menu)


22granite1
Originally uploaded by sprocket2cog.
Here's a sample for a menu background thzts a bit like concrete

12 March 2007

XBR online


Ive decided to finally commit to building a full scale robot, but rather then just do it and see how it turns out, ive decided to do a fair amount of design and prototyping in CAD before i start building.
Primarily the design is just the chassis and body , but the idea is to create a robot that can be used for a range of uses by changing a few parts around.
The robot is not a design for the lab or workbench, but rather a real world bot based on the four wheel skid steer rovoer designs that are all over the net.
The differance with this robot design is that it isnt some kit that looks like its a high school project, but rather a body that looks good and resembles robots from popular culture, the buyer would then insert his own brains and sensors to do what they want it to.
Ideally the robot will have power and drive systems installed before delivery, but parts for just the chassis could be supplied, and even an open source project letting people download plans and build their own prototype chassis, could be provided.
We are just going to run with this until it works, or we fall over, but we will be giving this the best go at success that we can muster, in terms of time effort and what little money we can scrape together.
The project has spawned a blog that will document the design of the robot shell, and hopefully instill a desire in other robot enthuthist's to build better robot bodies to but their robot projects into. The link is http://xbr-online.blogspot.com/

06 March 2007

3..2..1..SUMO !!


Heres a quick little battle between two ai2 robots from microbric, these little beast's come programmed with several modes including this one.
Ill try to get the viper sumo and the ai2 bots fighting each other soon as well.
But in the mean time grab your giant foam finger and cheer for your favorite team.. RED or....RED.., and yes, in the second video there is a winner. ;)
Catch you when the sparks stop flying...
sprocket

05 March 2007

Why we need to teach Robotics


WEll news in Australia for the workers at the Holden plant is grim, with over 600 workers given the heave ho in favor of...you guessed it ROBOTS.. I did a google search on the holden plant and was able to locate a company called sage automation that way back in 2003 was awarded a contract by major german firm,Eisenmann. THis multi million dollar contract was part of a 5 year plan to upgrade the car plants in around the world, including ..you guesses it, the Eliabeth facility in South Australia.
So with companys like Sage employing more people to design and construct robot systems for manufactoring, then we realise that now is the time for schools to start training our kids in the Basic's (pun intended) of control systems and basic mechanical and pnuematic systems so they can get good jobs servicing the robot workers and even designing them.
The Robot revolution is going to have some casultity's so nows the time to cut your losses and turn to the dark side...long live the robots...

the image is the elizabeth plant in circa 1965 ? not a robot in sight

MICROBRIC AI2 New FIRMWARE


Well the much awaited release of the new advanced firmware and gui has arrived with the guys over at microbric just releasing the links to get your version today.
You will need to follow the directions to update your ai2, but once you have it will give you a robot brain with all the bells and whistles stripped out leaving you with nearly double the avaliable memory for your own "take over the world " code...
So what can you expect, well at first glance you might think there isnt much new.
(Apart from the lack of a draw to lcd command icon..)
But there is ...Firstly the most obvious is the ability to build your own robot with out having to conform to the basic configuration. Now you can add a second set of motors or more sensors, including your own homebrewed ones, as now you have accsess to more control with addtional little features unlocking in the bricworks software.
One of the most powerful unlock's is the ability to control the if and loop statements with recevied serial data. This means you can set up the ai2 to receive PC based controls fairly easily if you have a grasp on sending ascii via a telnet program to the com port your using, or for letting the viper talk directly via cable to its younger sibling.
Some of the other little things you might notice is the ability to finally use the analogue in, which because you couldnt rearrange modules couldnt be used.
Now it allows reading up to 2volts in 1024 20mv steps, so finally we can add a host of analogue based sensors on to the bot, including variable resistors, temprature sensors and even windspeed if you want to, maybe you could make a handheld weather station ?
or a remote locking system for your car or bike.
The ideas are endless.
But if you missed out on the ai2 , then you can still buy the big brother from microbric or dick smith electronics.
There is also several Overseas stockist's so check out the net HERE

03 March 2007

Hacking Web Camera's To 35mm Lens


Of all places to find this hack, I found it at a UFO watching site.
Basiclly if you take the lens off your camera and expose the ccd you can take a standard 35mm film lens and using some pvc pipe and some glue and screws you can construct a decent camera for watching the back yard.
You will need to work out the focal length to get it focused and the easiest way to do this is with a torch and a tape measure.
First set your lens to a know length on the lens, say 1meter , then you need to place the lens 1 m away from the torch so the light shines though it. Now take a sheet of paper and place it behind the lens, you should see the torch light on the paper, move the paper in and out untill the light is focused ( all be it on a miniture scale) on the paper.
This is the distance the webcam screen needs to be for it to be in focus.
Work out a system to hold it in place and then plug it in.
I know this is a basic tutorial but as all lens are diffrent you will have to muck around with the right way to mount the components together.
happy hacking..The image is streamed from my camera when it's up and running.
refresh to see new pic, updated every 2 mins or so.

01 March 2007

RobospienV2 Revisted

I have decided to go through some of the earlier hacks and mods for those that missed it.
Ive had a lot of interest in some of the older robosapien and roboraptor hacks, so ill start with a quick over veiw of the v2 cover removel.
First things first, lay the robot down with the arms by its side in the neutral postion.
locate all the screws in the hips and body section, making sure not to overlook the shoulders. remove the screws and place them to the side.
The front will come off first, then you will need to remove the screws inside near the shoulders to remove the back cover, the motor control board is located on the back, at the top of this photo.
Ill go into more detail about the v2 later, includeing a basic head hack that takes under twenty minutes and gives you a crazy new robot....stay tuned.